
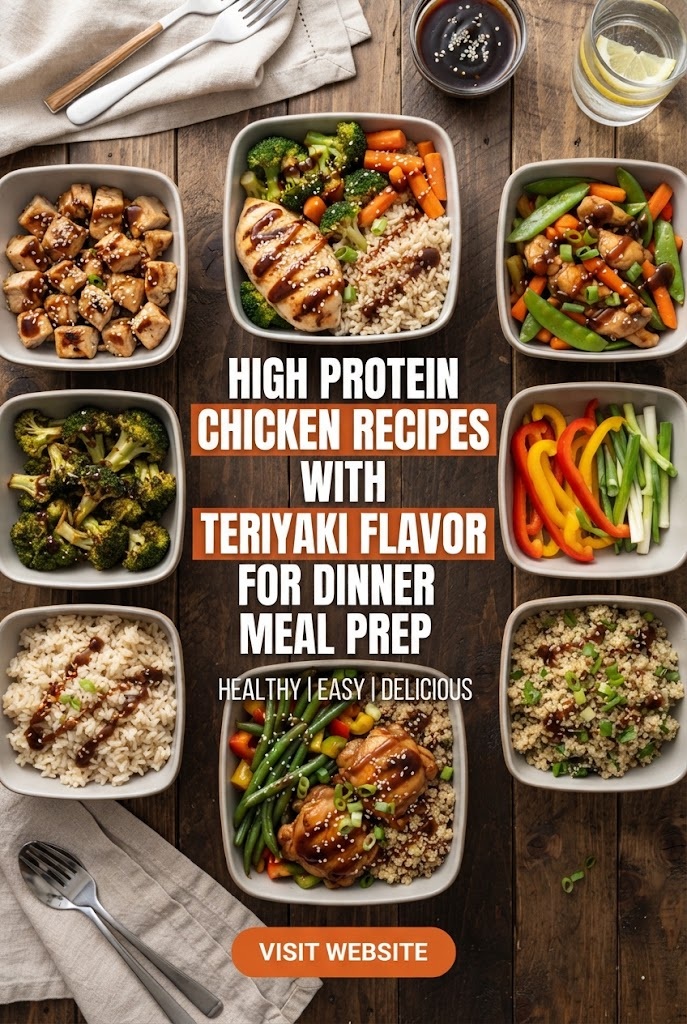
The quest for a perfectly balanced meal that satisfies the palate while fueling muscle growth often leads to one legendary flavor profile: Teriyaki. Originating from Japan, the word “Teriyaki” describes a cooking technique where foods are broiled or grilled with a glaze of soy sauce, mirin, and sugar. In the modern fitness world, we have taken this classic profile and evolved it into a nutritional powerhouse.
High-protein chicken recipes with teriyaki flavor are the “Holy Grail” of dinner meal prep. They offer a sophisticated balance of savory umami, delicate sweetness, and aromatic zing, all while providing the essential amino acids required for recovery and metabolic health. In this comprehensive guide, we will explore five distinct ways to prepare Teriyaki chicken for your weekly meal prep, ensuring you never get bored and always hit your macros.
The Nutritional Powerhouse: Why Teriyaki Chicken for Meal Prep?
Before we dive into the recipes, it is essential to understand why chicken and teriyaki make such a formidable duo for your health goals.
- High-Quality Protein: Chicken breast is one of the leanest sources of protein available. A standard 6-ounce serving provides roughly 50 grams of protein, making it ideal for those looking to build lean muscle mass or maintain satiety during weight loss.
- Flavor without Fat: Unlike cream-based sauces or heavy gravies, a well-made teriyaki sauce relies on fermented soy and aromatics. While traditional versions contain sugar, meal-preppers can easily swap this for honey, maple syrup, or sugar-free alternatives to control caloric intake.
- Meal Prep Longevity: Chicken thighs and breasts hold up exceptionally well when reheated. Unlike steak, which can become rubbery, or seafood, which can develop an off-putting odor, teriyaki-glazed chicken maintains its moisture and flavor profile over 4–5 days in the refrigerator.
Recipe 1: The Classic High-Protein Teriyaki Chicken Bowl
This is the foundation. It features succulent chunks of chicken breast, a homemade low-sodium glaze, and a colorful array of steamed vegetables over a bed of complex carbohydrates.
Ingredient Details in Form and Shape
| Category | Ingredient | Quantity | Preparation Shape/State |
|---|---|---|---|
| Protein | Lean Chicken Breast | 2 lbs | 1-inch cubes |
| Aromatics | Fresh Ginger | 2 tbsp | Finely grated/minced |
| Aromatics | Fresh Garlic | 4 cloves | Minced |
| Liquid Base | Low-Sodium Soy Sauce | 1/2 cup | Liquid |
| Sweetener | Raw Honey | 1/4 cup | Liquid/Viscous |
| Acid/Flavor | Rice Vinegar | 2 tbsp | Liquid |
| Oil | Toasted Sesame Oil | 1 tbsp | Liquid |
| Thickener | Cornstarch | 1 tbsp | Mixed with 2 tbsp cold water |
| Garnish | Green Onions | 1/2 cup | Thinly sliced on bias |
| Garnish | Toasted Sesame Seeds | 1 tbsp | Whole seeds |
| Base | Brown Rice or Quinoa | 3 cups | Cooked and fluffed |
| Veggie | Broccoli Florets | 4 cups | Bite-sized pieces |
Recipe Detail Step-by-Step
Step 1: The Marinade Magic In a medium glass bowl, whisk together the soy sauce, honey, rice vinegar, sesame oil, minced garlic, and grated ginger. Place the cubed chicken into a large resealable bag or airtight container and pour half of the sauce over it. Let it marinate for at least 30 minutes (or up to 4 hours) in the refrigerator. Reserve the other half of the sauce for later.
Step 2: Preparing the Base and Greens While the chicken marinates, cook your brown rice or quinoa according to package instructions. In a separate steamer basket or a pot with a small amount of water, steam the broccoli florets until they are vibrant green and “tender-crisp” (about 4–5 minutes). Do not overcook, as they will soften further during reheating.
Step 3: Searing the Protein Heat a large non-stick skillet or wok over medium-high heat. Add a spray of avocado oil. Remove the chicken from the marinade (discard the used marinade) and add it to the pan in a single layer. Let it sear undisturbed for 3 minutes to develop a golden-brown crust. Flip and cook for another 3–4 minutes until cooked through.
Step 4: The Glaze Reduction Pour the reserved half of the sauce into the skillet with the chicken. Bring it to a simmer. In a small cup, mix the cornstarch and water to create a “slurry.” Pour the slurry into the pan and stir constantly. The sauce will transform from a thin liquid to a thick, glossy glaze that clings to the chicken.
Step 5: Assembly for Meal Prep Line up four to five meal prep containers. Distribute the rice evenly among them. Add a generous portion of steamed broccoli to one side. Top the rice with the glazed teriyaki chicken. Sprinkle with sesame seeds and green onions while the chicken is still warm so the garnish sticks. Let cool completely before sealing.
Recipe 2: Teriyaki Chicken Stir-Fry with “Power Greens”
For those looking to maximize their micronutrient intake, this stir-fry incorporates bok choy, snap peas, and bell peppers, providing a massive volume of food for relatively few calories.
Ingredient Details in Form and Shape
| Category | Ingredient | Quantity | Preparation Shape/State |
|---|---|---|---|
| Protein | Boneless Chicken Thighs | 1.5 lbs | Thin strips |
| Vegetable | Baby Bok Choy | 3 heads | Quartered lengthwise |
| Vegetable | Red Bell Pepper | 2 large | Thin julienne strips |
| Vegetable | Sugar Snap Peas | 1 cup | Stringed, kept whole |
| Vegetable | Carrots | 1 large | Matchstick cut |
| Sauce | Liquid Aminos | 1/3 cup | Liquid |
| Sauce | Pineapple Juice | 1/4 cup | Liquid (natural sweetener) |
| Spice | Red Pepper Flakes | 1 tsp | Dried flakes |
| Fat | Coconut Oil | 1 tbsp | Solid (melted in pan) |
Recipe Detail Step-by-Step
Step 1: Prep the Thighs Using chicken thighs for this recipe ensures the meat stays juicy, even with the high heat of a stir-fry. Slice the thighs into very thin strips, roughly 2 inches long. This increased surface area allows more of the teriyaki flavor to penetrate the meat.
Step 2: High-Heat Sear Heat a wok until it is smoking slightly. Add the coconut oil. Toss in the chicken strips. The goal here is a quick, intense cook. Because the strips are thin, they will cook in 4–5 minutes. Remove the chicken from the wok and set aside on a plate.
Step 3: The Veggie Flash-Fry In the same wok (no need to clean), add the carrots and peppers. Stir-fry for 2 minutes. Add the snap peas and bok choy. The moisture from the bok choy will help de-glaze the pan. Stir-fry for another 3 minutes until the leaves of the bok choy have wilted but the stems remain crunchy.
Step 4: Unifying the Dish Whisk the liquid aminos, pineapple juice, and red pepper flakes together. Return the chicken to the wok. Pour the sauce over the entire mixture. Toss vigorously for 60 seconds. The natural sugars in the pineapple juice will caramelize slightly under the high heat.
Step 5: Storage Divide the stir-fry into containers. Because this dish is vegetable-heavy, it is best to store it with a slice of lime in each container to brighten the flavors when you’re ready to eat.
Recipe 3: Baked Teriyaki Chicken Meatballs (The Portability King)
Meatballs are an underrated meal prep option. They are easy to portion, highly portable, and hold onto the sauce better than almost any other shape.
Ingredient Details in Form and Shape
| Category | Ingredient | Quantity | Preparation Shape/State |
|---|---|---|---|
| Protein | Ground Chicken | 2 lbs | Raw ground |
| Binder | Almond Flour | 1/2 cup | Fine powder |
| Binder | Egg | 1 large | Beaten |
| Flavor | Onion Powder | 1 tbsp | Dried powder |
| Flavor | Garlic Powder | 1 tbsp | Dried powder |
| Teriyaki | Thick Teriyaki Glaze | 1 cup | High viscosity/thick |
| Side | Zucchini Noodles | 4 cups | Spiralized |
| Crunch | Water Chestnuts | 1/2 cup | Finely diced |
Recipe Detail Step-by-Step
Step 1: The Meatball Mixture In a large mixing bowl, combine the ground chicken, almond flour, beaten egg, onion powder, garlic powder, and the finely diced water chestnuts. The water chestnuts are the “secret ingredient” here, providing a crunch that mimics traditional Asian dumplings.
Step 2: Shaping the Protein Using a small cookie scoop or your hands, form the mixture into balls about 1.5 inches in diameter. You should get approximately 20–24 meatballs. Place them on a baking sheet lined with parchment paper, ensuring they aren’t touching.
Step 3: The First Bake Preheat your oven to 400°F (200°C). Bake the meatballs for 15 minutes. This sets the shape and cooks them about 80% of the way through.
Step 4: The Glazing Phase Remove the tray from the oven. Using a brush or a spoon, coat each meatball generously with a thick teriyaki glaze. Return to the oven for another 5–7 minutes. The heat will cause the glaze to “tack up,” creating a sticky, delicious exterior.
Step 5: Pairing for Prep While the meatballs finish, quickly sauté your zucchini noodles (zoodles) in a pan for 2 minutes with a pinch of salt. Place the zoodles in your containers and top with 4–5 meatballs per serving. This is a low-carb, high-protein masterpiece.
Recipe 4: Sheet Pan Teriyaki Chicken and Pineapple
Sheet pan meals are the ultimate time-saver for busy professionals. Everything cooks at once, and the cleanup is minimal.
Ingredient Details in Form and Shape
| Category | Ingredient | Quantity | Preparation Shape/State |
|---|---|---|---|
| Protein | Chicken Breast | 1.5 lbs | 1-inch thick medallions |
| Fruit | Fresh Pineapple | 2 cups | Large chunks |
| Veggie | Red Onion | 1 large | Large wedges |
| Veggie | Green Bell Pepper | 2 large | 1-inch squares |
| Marinade | Teriyaki Sauce | 3/4 cup | Liquid |
| Fat | Olive Oil | 1 tbsp | Liquid |
Recipe Detail Step-by-Step
Step 1: Prep the Components Cut the chicken, pineapple, onions, and peppers into roughly the same size. This is crucial for “even cooking.” When the shapes are uniform, nothing ends up burnt while other pieces are raw.
Step 2: The Tossing In a massive bowl, toss all the ingredients (chicken, fruit, and veggies) with the olive oil and half of the teriyaki sauce. Ensure every piece of chicken and vegetable is glistening.
Step 3: The Sheet Pan Arrangement Spread the mixture out on two large baking sheets. Do not crowd the pan! If the pieces are too close together, they will steam instead of roast. You want space between the items so the edges of the pineapple can caramelize and the chicken can develop a golden hue.
Step 4: Roasting Roast at 425°F (220°C) for 18–22 minutes. At the halfway point, remove the pans and give everything a good toss. If you want an extra char, turn the broiler on for the final 2 minutes of cooking.
Step 5: The Final Drizzle Once out of the oven, drizzle the remaining fresh teriyaki sauce over the hot ingredients. The residual heat will absorb the sauce. Serve this with a side of cauliflower rice for a light, tropical-themed dinner prep.
Recipe 5: Slow Cooker “Shredded” Teriyaki Chicken
This recipe is perfect for those who like “bowl style” meals where the chicken can be easily mixed with rice and beans or stuffed into wraps.
Ingredient Details in Form and Shape
| Category | Ingredient | Quantity | Preparation Shape/State |
|---|---|---|---|
| Protein | Chicken Breast | 3 lbs | Whole breasts |
| Liquid | Soy Sauce | 1/2 cup | Liquid |
| Sweet | Brown Sugar (or Swerve) | 1/3 cup | Granulated |
| Acid | Apple Cider Vinegar | 2 tbsp | Liquid |
| Aromatic | Garlic | 6 cloves | Smashed |
| Heat | Sriracha | 1 tbsp | Paste/Liquid |
Recipe Detail Step-by-Step
Step 1: Set and Forget Place the whole chicken breasts into the bottom of the slow cooker. In a small jar, shake together the soy sauce, sweetener, vinegar, smashed garlic, and sriracha. Pour this over the chicken.
Step 2: Slow Transformation Cook on “Low” for 4 to 6 hours. Cooking chicken breast on high in a slow cooker can sometimes make it dry, so the low and slow method is preferred for a succulent shred.
Step 3: The Shredding Once the chicken is tender enough to fall apart with a fork, remove the breasts from the slow cooker and place them on a cutting board. Use two forks to shred the meat into long, thin strands.
Step 4: Sauce Reduction (The Secret Step) The liquid left in the slow cooker will be quite thin. Pour it into a small saucepan and boil it on the stove for 10 minutes until it reduces by half and becomes a syrupy glaze. Toss the shredded chicken back into this concentrated sauce.
Step 5: Portions This makes a large batch. Portion the shredded teriyaki chicken into 6-ounce servings. It is incredibly versatile—you can put it over rice, inside corn tortillas with slaw, or even on top of a salad.
Mastering the Teriyaki Sauce: A Deep Dive into Ingredients
To truly excel at high-protein teriyaki meal prep, you must understand the components of the sauce. Many store-bought versions are loaded with high-fructose corn syrup and preservatives. Making your own allows you to control the macros.
The Salty Element: Soy Sauce vs. Alternatives
- Traditional Soy Sauce: Provides the classic fermented depth. Always opt for “Low Sodium” to prevent water retention and bloating during your fitness journey.
- Tamari: A gluten-free alternative that is slightly richer and less salty than traditional soy sauce.
- Liquid Aminos (Bragg’s): Derived from soybeans but not fermented in the same way. It has a lighter flavor and is very popular in the fitness community for its amino acid profile.
- Coconut Aminos: The go-to for Paleo or Soy-Free diets. It is naturally sweeter and lower in sodium, though you may need to add a pinch of salt to balance the flavor.
The Sweet Element: Balancing the Umami
- Honey: Provides a floral sweetness and a great “stickiness” for glazes.
- Maple Syrup: Offers a unique depth of flavor that pairs surprisingly well with ginger.
- Brown Sugar: Traditional and provides that deep molasses undertone.
- Monk Fruit/Erythritol: Excellent for those on a ketogenic or low-calorie diet. These sweeteners provide the sweetness without the glycemic impact.
The Aromatics: The Soul of Teriyaki
- Ginger: Never use powdered ginger if you can avoid it. Freshly grated ginger provides a “heat” and freshness that defines the dish.
- Garlic: Use fresh cloves. The sulfur compounds in garlic are best released when crushed or minced right before cooking.
Strategies for Successful Meal Prepping
Preparing 10–15 meals at once requires more than just a good recipe; it requires a system.
1. Temperature Control
Never put steaming hot chicken directly into a sealed plastic container. This creates steam, which turns into condensation, leading to “soggy” chicken and vegetables. Let your food reach room temperature (about 20–30 minutes) before sealing and refrigerating.
2. The “Sauce on the Side” Rule
If you prefer your vegetables to stay very crisp, consider keeping your teriyaki sauce in small 2-ounce condiment containers. Pour the sauce over the meal only after you have reheated it. This prevents the rice from absorbing all the moisture and becoming mushy.
3. Reheating Secrets
To keep chicken moist during reheating, add a teaspoon of water to the container before microwaving. Cover it with a damp paper towel. The towel traps the steam, ensuring the protein remains tender rather than turning into “chicken jerky.”
4. Container Selection
Invest in high-quality, BPA-free glass containers. Glass doesn’t retain odors, it’s safer for microwave use, and it keeps the food tasting fresher than plastic.
Variations to Keep Things Interesting
Even the best Teriyaki chicken can become repetitive if eaten every day. Here are three quick “flips” to change the flavor profile slightly:
- The Spicy Kick: Add 2 tablespoons of Gochujang (Korean chili paste) to your teriyaki sauce. It adds a smoky heat that transforms the dish into a “Korean-Japanese” fusion.
- The Tropical Twist: Swap 1/4 of the soy sauce for pineapple juice and add a squeeze of lime. This lightens the dish significantly and makes it feel like a summer meal.
- The Nutty Infusion: Whisk a tablespoon of natural peanut butter into the sauce. This creates a “Teriyaki-Satay” hybrid that is incredibly satisfying and adds healthy fats to your meal.
Conclusion: The Path to Consistent Gains
Meal prepping high-protein teriyaki chicken is more than just a kitchen chore; it is an investment in your future self. By spending two hours on a Sunday preparing these recipes, you remove the “decision fatigue” that often leads to poor dietary choices during a busy work week.
Whether you choose the classic bowl, the veggie-packed stir-fry, the portable meatballs, the easy sheet pan roast, or the versatile shredded chicken, you are giving your body the high-quality protein it needs with the flavors it craves. Teriyaki is the bridge between “diet food” and “delicious food.” Master these recipes, and you will find that hitting your fitness goals has never tasted so sweet.
Remember, the key to long-term success is variety and quality. Use fresh ingredients, experiment with the sauce ratios, and find the version that makes you excited to open your lunchbox every single day. Happy prepping!