
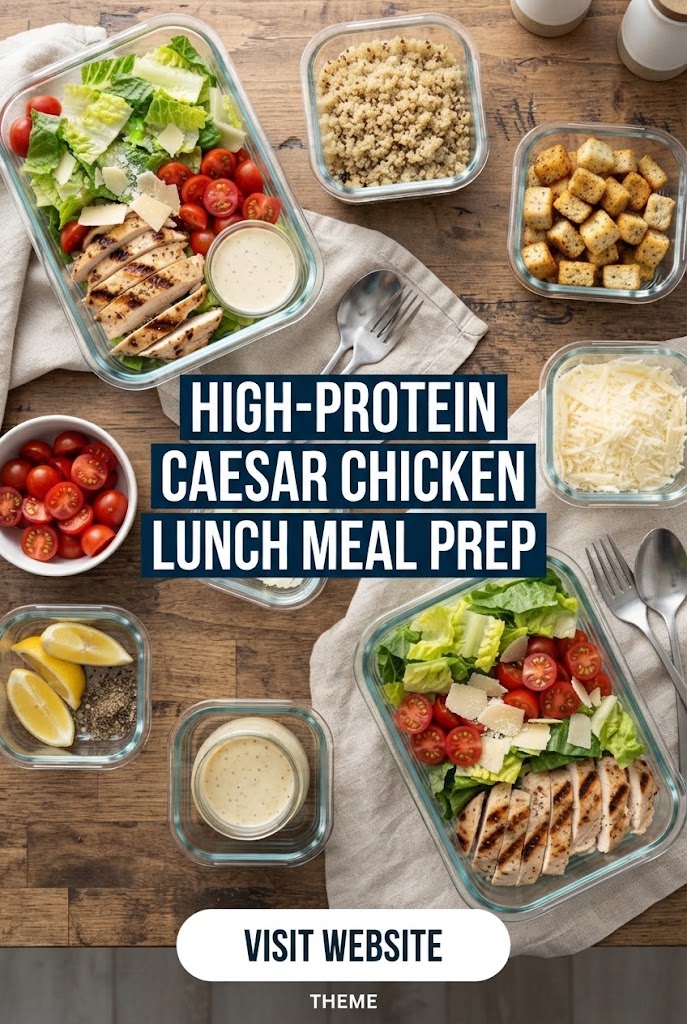
The Caesar salad is a timeless classic, beloved for its punchy, umami-rich dressing, crisp greens, and savory accents. However, as a standalone salad, it often falls short for those tracking their macros or looking for a satiating midday meal. By pivoting the focus toward high-quality protein and complex carbohydrates, we can transform the “Caesar flavor” into a meal-prep powerhouse.
Whether you are a fitness enthusiast looking to hit 40+ grams of protein per meal or a busy professional seeking a lunch that won’t lead to a 3 PM sugar crash, these recipes offer the perfect balance of flavor, nutrition, and convenience.
In this comprehensive guide, we will explore five distinct ways to meal prep Caesar-flavored chicken, ranging from traditional bowls to innovative wraps and grain-based power salads.
The Nutritional Powerhouse: Why Caesar Chicken?
Before we dive into the recipes, it is essential to understand why Caesar-style chicken is such a fantastic choice for meal prepping.
- High Satiety: Chicken breast is one of the leanest sources of high-quality protein. When paired with the healthy fats in a Caesar dressing (especially those made with olive oil or Greek yogurt), it triggers satiety hormones that keep you full for hours.
- Flavor Versatility: The core components of Caesar flavor—garlic, lemon, parmesan, and black pepper—pair beautifully with almost any vegetable or grain.
- Cold or Hot: Unlike some meal prep options that must be heated, Caesar-flavored dishes often taste just as good (or better) when consumed cold or at room temperature, making them ideal for office environments where microwave access might be limited.
Recipe 1: The Classic High-Protein Caesar Chicken & Roasted Broccoli Bowls
This is the gold standard for meal prep. We swap out the croutons for roasted broccoli to add volume and fiber without the empty calories of white bread.
Ingredient Details (Form Shape)
| Category | Ingredient | Quantity (4 Servings) | Purpose |
|---|---|---|---|
| Protein | Chicken Breast (Boneless/Skinless) | 2 lbs (approx. 900g) | Primary protein source |
| Vegetable | Fresh Broccoli Florets | 4 large heads | Fiber and volume |
| Base | Quinoa or Brown Rice (Cooked) | 2 cups | Complex carbohydrates |
| Dressing | Greek Yogurt Caesar Dressing | 1/2 cup | Creaminess and probiotics |
| Garnish | Shaved Parmesan Cheese | 1/4 cup | Salty umami kick |
| Seasoning | Garlic Powder, Salt, Black Pepper | 1 tbsp each | Basic flavoring |
| Acid | Fresh Lemon Juice | 2 tbsp | Brightness and preservation |
Recipe Detail: Step-by-Step
Step 1: Prepare the Chicken Preheat your oven to 400°F (200°C). Pat the chicken breasts dry with paper towels. Slice the chicken into even, 1-inch strips. This ensures quick, even cooking and makes it easier to divide into meal prep containers.
Step 2: Seasoning and Roasting In a large mixing bowl, toss the chicken strips and broccoli florets with 1 tablespoon of olive oil, garlic powder, salt, and plenty of cracked black pepper. Spread them out in a single layer on a large parchment-lined baking sheet. Roast for 18–22 minutes until the chicken reaches an internal temperature of 165°F (74°C) and the broccoli edges are slightly charred.
Step 3: The “Macro-Friendly” Dressing While the chicken roasts, prepare your dressing. If you aren’t using store-bought, whisk together 1/2 cup plain non-fat Greek yogurt, 1 tsp Dijon mustard, 1 minced garlic clove, 1 tsp anchovy paste (optional but recommended), 2 tbsp lemon juice, and 2 tbsp grated parmesan. This version adds extra protein compared to traditional oil-based dressings.
Step 4: Assembly Divide the cooked quinoa or brown rice into four meal prep containers. Add a generous portion of roasted broccoli and the sliced Caesar chicken.
Step 5: Finishing Touches Drizzle the dressing over the chicken while it’s still slightly warm so it absorbs the flavor, or keep it in a small separate container to prevent the broccoli from getting soggy. Top with shaved parmesan and a wedge of lemon.
Recipe 2: Caesar Chicken Pasta Salad with Chickpea Noodles
For those who crave pasta but want to avoid the “carb coma,” using chickpea or lentil pasta provides a massive protein and fiber boost.
Ingredient Details (Form Shape)
| Category | Ingredient | Quantity (4 Servings) | Purpose |
|---|---|---|---|
| Protein | Shredded Rotisserie Chicken | 3 cups | Convenience and texture |
| Pasta | Chickpea Penne or Rotini | 8 oz (dry) | High-protein carb source |
| Crunch | Sliced Red Onion & Celery | 1/2 cup each | Texture and micronutrients |
| Greens | Chopped Kale or Spinach | 2 cups | Nutrient density |
| Dressing | Light Caesar Vinaigrette | 3/4 cup | Coating and moisture |
| Fats | Toasted Pine Nuts or Sunflower Seeds | 2 tbsp | Healthy fats and crunch |
| Cheese | Pecorino Romano | 3 tbsp | Sharp flavor profile |
Recipe Detail: Step-by-Step
Step 1: Boil the Pasta Bring a large pot of salted water to a boil. Cook the chickpea pasta according to package directions. Crucial Tip: Chickpea pasta can go from al dente to mushy very quickly. Drain it 1 minute before the suggested time and immediately rinse with cold water to stop the cooking process and remove excess starch.
Step 2: Prep the Greens If using kale, remove the tough ribs and finely chop the leaves. Massage the kale with a teaspoon of olive oil and a pinch of salt for 2 minutes. This breaks down the fibrous structure, making it much easier to digest and more pleasant to eat cold.
Step 3: Shred the Protein Using a pre-cooked rotisserie chicken is a great meal prep hack. Remove the skin and shred the breast meat into bite-sized pieces.
Step 4: The Mix In a very large bowl, combine the cooled pasta, shredded chicken, massaged kale, diced celery, and red onion.
Step 5: Emulsify and Coat Pour the Caesar vinaigrette over the mixture. Toss thoroughly to ensure every piece of pasta and chicken is coated. The chickpea pasta will absorb some of the dressing over time, so if you’re eating this on day 3 or 4, you might want to add a splash of lemon juice to loosen it up.
Step 6: Storage Portion into airtight containers. Sprinkle the toasted seeds and Pecorino Romano on top just before sealing.
Recipe 3: Low-Carb Caesar Chicken Lettuce Wraps with Parmesan Crisps
If you are focusing on a ketogenic or low-carb diet, these wraps replace the bread/grain with butter lettuce, using homemade parmesan crisps for that essential Caesar crunch.
Ingredient Details (Form Shape)
| Category | Ingredient | Quantity (4 Servings) | Purpose |
|---|---|---|---|
| Protein | Ground Chicken or Diced Thighs | 1.5 lbs | Richer flavor profile |
| Wrap | Butter Lettuce or Romaine Hearts | 2 heads | The “vessel” |
| Crunch | Homemade Parmesan Whisps | 1 cup | Keto-friendly crouton |
| Cream | Avocado Oil Caesar Dressing | 1/2 cup | Healthy monounsaturated fats |
| Zest | Lemon Zest & Capers | 1 tbsp each | Briny, bright notes |
| Veggie | Diced Cucumber | 1 cup | Hydration and crunch |
Recipe Detail: Step-by-Step
Step 1: Sauté the Chicken In a skillet over medium-high heat, cook the ground chicken or finely diced thighs until browned and cooked through. Season with salt, pepper, and a dash of onion powder. Drain any excess fat. Let the chicken cool slightly—putting hot meat directly onto lettuce will cause it to wilt immediately.
Step 2: Create the Parmesan “Croutons” Preheat oven to 350°F (175°C). On a silicone mat or parchment paper, place small mounds of grated parmesan cheese (about 1 tablespoon each). Bake for 5–7 minutes until golden and bubbly. Let them cool completely; they will become crisp. Break them into small shards.
Step 3: Prep the Lettuce Wash and dry the butter lettuce leaves carefully. To keep them crisp for meal prep, wrap the leaves in a damp paper towel and place them in a separate Ziploc bag or container from the chicken.
Step 4: The Filling Mix the cooled chicken with the diced cucumbers, capers, and the avocado oil Caesar dressing. Fold in the lemon zest.
Step 5: Meal Prep Layout In your meal prep container, place the chicken mixture on one side and the lettuce leaves on the other. Put the parmesan shards in a small condiment cup.
Step 6: Serving When it’s time for lunch, simply spoon the chicken mixture into the lettuce leaves and top with the parmesan “croutons.” This prevents the lettuce from getting soggy and keeps the “croutons” crispy.
Recipe 4: Caesar Chicken and Quinoa Stuffed Peppers
For a hot meal prep option that feels like a gourmet dinner, stuffing bell peppers with a Caesar-inspired chicken and quinoa filling is a game changer.
Ingredient Details (Form Shape)
| Category | Ingredient | Quantity (4 Servings) | Purpose |
|---|---|---|---|
| Protein | Cooked Diced Chicken Breast | 2 cups | Lean protein |
| Base | Cooked Quinoa | 1.5 cups | Protein-rich grain |
| Vessel | Large Bell Peppers (Any color) | 4 peppers | Vitamin C and container |
| Binder | Egg White & Greek Yogurt | 1/4 cup each | Holds filling together |
| Flavor | Anchovy Paste & Minced Garlic | 1 tsp / 2 cloves | Deep Caesar profile |
| Topping | Panko Breadcrumbs (Optional) | 2 tbsp | For a crispy lid |
| Cheese | Mozzarella/Parmesan Blend | 1/2 cup | Melty texture |
Recipe Detail: Step-by-Step
Step 1: Prepare the Peppers Slice the tops off the bell peppers and remove the seeds and membranes. To ensure they cook through during the baking process, you can pre-steam them in the microwave for 3 minutes or par-boil them for 2 minutes.
Step 2: Create the Filling In a large bowl, combine the cooked quinoa, diced chicken, Greek yogurt, egg white, minced garlic, anchovy paste, and half of the cheese blend. The egg white and yogurt act as a binder, ensuring the filling doesn’t fall apart when you cut into the pepper.
Step 3: Stuffing Spoon the mixture into the prepared peppers, pressing down firmly to pack it in.
Step 4: The Crust Mix the remaining cheese with the panko breadcrumbs. Sprinkle this over the top of each pepper.
Step 5: Baking Place the peppers upright in a baking dish. Pour 1/4 cup of water into the bottom of the dish to create steam. Cover with foil and bake at 375°F (190°C) for 20 minutes. Remove the foil and bake for another 10–15 minutes until the tops are golden brown and the peppers are tender.
Step 6: Storage These peppers are incredibly sturdy. Let them cool completely before placing them into individual containers. They reheat perfectly in the microwave (2–3 minutes) or an air fryer (5 minutes at 350°F).
Recipe 5: Caesar Chicken Bento Box with “Caesar” Dipping Sauce
This is the ultimate “no-cook” (using pre-cooked chicken) assembly meal prep for those who like variety and a “snack-style” lunch.
Ingredient Details (Form Shape)
| Category | Ingredient | Quantity (4 Servings) | Purpose |
|---|---|---|---|
| Protein | Grilled Chicken Strips | 24 oz | Main protein |
| Side 1 | Hard-Boiled Eggs | 4 eggs | Extra protein and healthy fats |
| Side 2 | Raw Snap Peas & Carrots | 2 cups | Crunch and vitamins |
| Fruit | Apple Slices or Grapes | 1 cup | Natural sweetness |
| Dip | Creamy Caesar Dip | 1/2 cup | Flavor center |
| Treat | Roasted Chickpeas | 1/2 cup | Savory crunch |
Recipe Detail: Step-by-Step
Step 1: The Chicken Use pre-grilled chicken breast strips. You can buy these or grill a batch at the start of the week using just salt, pepper, and lemon juice.
Step 2: Hard-Boiling Eggs Place eggs in a pot, cover with water, and bring to a boil. Once boiling, turn off the heat, cover, and let sit for 9 minutes. Transfer to an ice bath immediately. This results in a perfect yolk without the “green ring.” Peel and halve them for the bento box.
Step 3: The Caesar Dip To make the dressing “dip-able,” mix 1/2 cup of thick Greek yogurt with 1 tbsp of Caesar dressing concentrate or a mix of parmesan, garlic, and lemon. This makes it thicker so it stays on the chicken and veggies.
Step 4: Preventing Oxidation If adding apple slices, toss them in a little lemon juice to prevent browning before placing them in the box.
Step 5: Assembly Using a multi-compartment bento container:
- Place the chicken strips in the largest section.
- Place the veggies and egg halves in the secondary sections.
- Place the dipping sauce in a small leak-proof container in the center.
- Keep the roasted chickpeas in a separate small baggie or dry section to keep them from getting soft.
Deep Dive: Mastering the Caesar Flavor Profile
To make your meal prep successful, you need to understand the components of the Caesar flavor. It isn’t just “creamy dressing.” It is a balance of five specific elements:
- Salt (Parmesan & Anchovy): If you find your chicken tastes bland, it’s likely lacking this salty, fermented depth. Even if you hate whole anchovies, a tiny bit of anchovy paste in your marinade or dressing is the “secret ingredient” that makes it taste authentic.
- Acid (Lemon Juice): Lemon juice acts as a natural preservative, keeping your chicken moist and your greens vibrant throughout the week.
- Fat (Olive Oil or Yogurt): Fat carries the flavor of the garlic and pepper. Using Greek yogurt is the best way to keep the fat low while increasing the protein.
- Heat (Black Pepper): Traditional Caesar is heavy on the cracked black pepper. Don’t be shy with it.
- Aromatics (Garlic): Always use fresh minced garlic for dressings and garlic powder for dry rubs on the chicken.
The Best High-Protein Caesar Dressing Recipe
If you want to avoid store-bought versions which are often loaded with soybean oil and sugar, make this “Power Caesar” dressing:
- 1 cup Non-fat Plain Greek Yogurt
- 2 tbsp Extra Virgin Olive Oil
- 2 tsp Worcestershire Sauce
- 1 tsp Anchovy Paste
- 2 cloves Garlic (minced)
- 1/4 cup Grated Parmesan Cheese
- Juice of 1/2 Lemon
- 1/2 tsp Cracked Black Pepper
Instruction: Combine all ingredients in a blender or food processor and pulse until smooth. This dressing contains roughly 15g of protein per cup, compared to 0–2g in standard dressings.
Meal Prep Tips for Longevity and Texture
One of the biggest complaints with chicken meal prep is that the meat becomes “rubbery” or “dry” by Thursday. Here is how to prevent that:
1. The Art of the Marinade
Never cook your chicken “naked.” Even 30 minutes in a mixture of lemon juice, olive oil, and garlic powder will create a barrier that locks in moisture during the cooking process. For Caesar prep, marinating the chicken in Caesar dressing is a pro move.
2. Under-cook Slightly (If Reheating)
If you know you are going to microwave your chicken, cook it to an internal temperature of 160°F rather than 165°F. The reheating process will finish the cooking without drying it out. Note: Only do this if you are confident in your food safety and storage.
3. Separation is Key
If your meal includes “wet” ingredients (dressing, tomatoes, cucumbers) and “dry” ingredients (chicken, croutons, seeds), keep them separated. Use 2-ounce condiment cups for dressing. It takes an extra 10 seconds in the morning but preserves the quality of your meal significantly.
4. Choosing the Right Containers
Glass containers are superior for Caesar chicken. Plastic tends to absorb the strong odors of garlic and anchovy, which can be difficult to wash out. Glass also reheats more evenly and keeps the salad components colder if you’re eating it fresh.
Customizing Your Macros
Depending on your fitness goals, you can easily adjust these Caesar recipes:
- For Bulking (High Calorie/High Protein): Use chicken thighs instead of breasts. Add sliced avocado and use full-fat parmesan cheese. Use a base of white rice or pasta.
- For Cutting (Low Calorie/High Protein): Stick to chicken breast. Use the Greek yogurt dressing exclusively. Replace pasta/rice with cauliflower rice, spiralized zucchini (zoodles), or extra leafy greens.
- For Endurance Training (High Carb): Increase the portion of quinoa or pasta. Add roasted sweet potatoes to the Caesar bowl—the sweetness of the potato contrasts beautifully with the salty dressing.
Frequently Asked Questions
Can I freeze Caesar chicken meal prep?
You can freeze the cooked chicken and the grain components (rice/quinoa). However, do not freeze the Caesar dressing (if it’s yogurt or mayo-based) or the fresh greens. For best results, freeze the seasoned, cooked chicken in portions and assemble the salad/bowl with fresh veggies on the day you plan to eat it.
How long does Caesar chicken last in the fridge?
According to the USDA, cooked chicken is safe for 3 to 4 days when stored in a refrigerator at 40°F (4°C) or below. To maximize freshness, ensure your containers are truly airtight.
Is Caesar dressing “unhealthy”?
Traditional Caesar dressing is high in calories due to the oil and egg yolks. However, by making the Greek yogurt version described above, you turn a “cheat” food into a functional, high-protein sauce that fits into almost any diet plan.
What are some good vegan protein substitutes for Caesar flavor?
If you want to swap the chicken, “Chick’n” strips made from soy or pea protein work well. Roasted chickpeas or extra-firm smoked tofu are also excellent vehicles for Caesar dressing. For the dressing, use a cashew-base with nutritional yeast to mimic the parmesan flavor.
Final Thoughts on Caesar Meal Prep
The beauty of the Caesar flavor profile lies in its sophistication and simplicity. By focusing on high-protein chicken and smart ingredient swaps—like Greek yogurt for mayo and quinoa for croutons—you create a lunch that is not only delicious but also fuels your body for performance.
Meal prepping doesn’t have to be a chore of bland chicken and steamed broccoli. With the punchy acidity of lemon, the bite of fresh garlic, and the savory richness of parmesan, your “boring” work lunch can become the highlight of your day. Start with the Classic Roasted Bowl and experiment from there. Your taste buds—and your muscles—will thank you.