
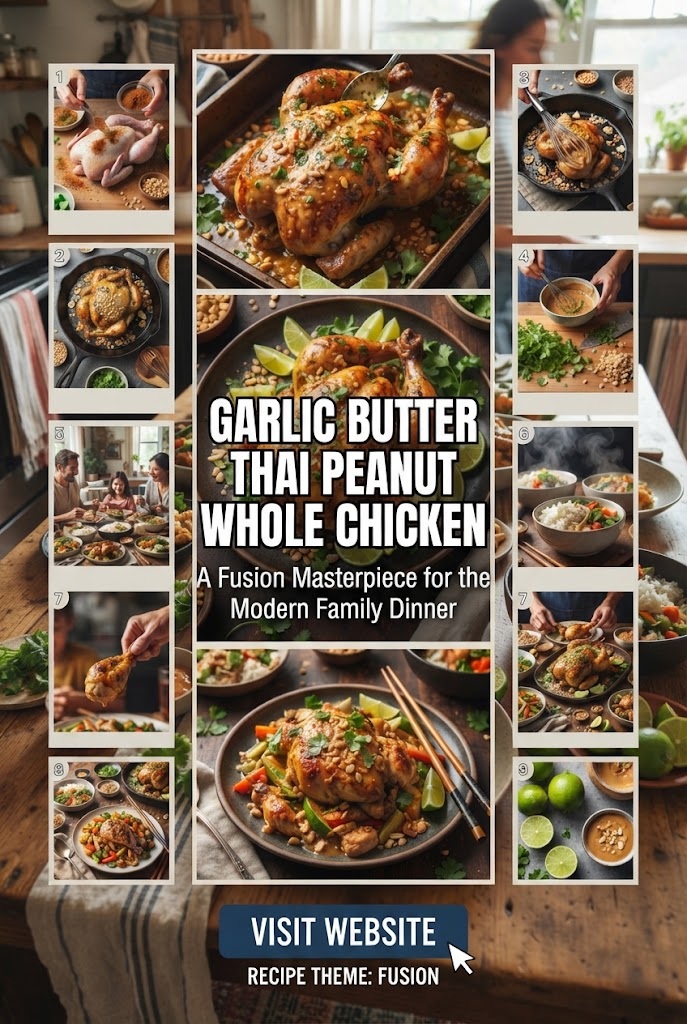
The family dinner is more than just a meal; it is a ritual, a pause in a hectic week, and a chance to reconnect over a shared sensory experience. While the classic Sunday roast has its place, the modern palate craves something more dynamic—a dish that marries the comforting richness of Western traditions with the vibrant, soul-stirring aromatics of Southeast Asia. Enter the Garlic Butter Thai Peanut Whole Chicken.
This dish is a culinary bridge. It takes the familiar, succulent structure of a perfectly roasted whole chicken and infuses it with a decadent garlic butter base, elevated further by a complex, savory-sweet Thai peanut glaze. It is a masterpiece of textures: crispy, buttery skin; tender, juice-drenched meat; and a thick, velvety sauce that begs to be drizzled over jasmine rice.
In this comprehensive guide, we will explore every facet of creating this showstopper, from the science of the perfect roast to the cultural alchemy of its flavors.
The Flavor Profile: Why Garlic Butter and Thai Peanut Work Together
To understand why this dish is so successful, we must look at the components of flavor. At its core, the Garlic Butter Thai Peanut Whole Chicken balances the five fundamental tastes: salty, sweet, sour, bitter, and umami.
The Role of Garlic Butter
Garlic and butter are the backbone of French and Mediterranean roasting. Butter provides the fat necessary to crisp the skin and keep the breast meat moist through a process called self-basting. Garlic adds an earthy, pungent depth that mellows into sweetness as it roasts. When these two are combined, they create a savory “fat carrier” that allows the other spices to penetrate deep into the muscle fibers of the bird.
The Magic of Thai Peanut Sauce
Thai peanut sauce (often associated with Satay) is a powerhouse of flavor. By using high-quality peanut butter as a base, we introduce creaminess and protein-rich fats. We then layer in:
- Red Curry Paste: For heat and a bouquet of lemongrass, galangal, and shrimp paste.
- Coconut Milk: To add a tropical silkiness.
- Fish Sauce: The ultimate source of umami and salt.
- Lime Juice: To cut through the richness with acidity.
- Brown Sugar or Honey: To caramelize the skin and balance the spice.
When the garlic butter meets the peanut sauce, it creates a “super-glaze.” The butter helps the peanut sauce adhere to the chicken, preventing it from sliding off, while the peanut fats enhance the browning of the skin, resulting in a deep mahogany hue that is visually stunning.
Selecting Your Bird: The Foundation of Quality
You cannot produce a world-class dinner with a subpar chicken. When shopping for your Garlic Butter Thai Peanut Whole Chicken, consider the following:
- Air-Chilled vs. Water-Chilled: Always opt for air-chilled chicken if available. Water-chilled birds absorb excess moisture during processing, which is released during cooking, leading to soggy skin and diluted flavor. Air-chilled birds have a more concentrated “chicken” taste and skin that crisps up beautifully.
- Size Matters: For a family of four to six, a 4-to-5-pound bird is ideal. Larger birds (roasters) can sometimes be tougher, while smaller birds (fryers) may cook too quickly before the glaze has a chance to caramelize.
- Organic and Free-Range: Beyond ethical considerations, free-range chickens tend to have more developed leg muscles and a higher fat-to-meat ratio in the thighs, which translates to more flavor.
The Essential Ingredients List
To execute this recipe to perfection, gather the following high-quality ingredients:
The Chicken & Prep
- 1 Whole Chicken (4–5 lbs)
- Kosher Salt and Coarse Black Pepper
- 1 Lemon (halved)
- 1 Head of Garlic (halved horizontally)
- A handful of fresh Thai Basil or Cilantro
The Garlic Butter Compound
- 1/2 cup Unsalted Butter (softened)
- 4 cloves Garlic (minced)
- 1 tsp Grated Ginger
- 1 tbsp Fresh Parsley (finely chopped)
The Thai Peanut Glaze
- 1/2 cup Creamy Peanut Butter (natural is best)
- 1/4 cup Full-fat Coconut Milk
- 2 tbsp Thai Red Curry Paste
- 1 tbsp Fish Sauce
- 1 tbsp Soy Sauce (or Tamari for gluten-free)
- 2 tbsp Fresh Lime Juice
- 1 tbsp Brown Sugar
- 1 tsp Sriracha or Chili Crisp (optional, for extra heat)
Step-by-Step Preparation: The Ritual of the Roast
Phase 1: Prepping and Brining
The secret to a juicy chicken is preparation. At least 4 hours (and up to 24 hours) before cooking, remove the chicken from its packaging and pat it completely dry with paper towels. Removing surface moisture is critical for crispy skin.
Generously season the cavity and the skin with kosher salt. Place the chicken on a wire rack over a baking sheet and leave it uncovered in the refrigerator. This “dry brining” process draws moisture out of the skin while seasoned salt penetrates the meat.
Phase 2: The Garlic Butter Application
Preheat your oven to 425°F (218°C). High heat at the beginning is essential for rendering the fat.
In a small bowl, mix your softened butter, minced garlic, ginger, and parsley. Using your fingers, gently loosen the skin over the chicken breasts and thighs, being careful not to tear it. Stuff about two-thirds of the garlic butter mixture directly under the skin, spreading it evenly. Rub the remaining third over the outside of the skin.
Inside the cavity, place the lemon halves, the halved head of garlic, and the herbs. This creates an “aromatic steam” inside the bird, flavoring it from the inside out.
Phase 3: The Initial Roast
Truss the chicken with kitchen twine to ensure even cooking. Place the chicken in a roasting pan or a large cast-iron skillet. Roast at 425°F for about 20–25 minutes. You are looking for the skin to start turning golden and the garlic butter to begin bubbling.
Phase 4: Applying the Thai Peanut Glaze
While the chicken is in its first stage of roasting, whisk together all the peanut glaze ingredients in a small saucepan over low heat. You want the mixture to be smooth and pourable, but thick enough to coat a spoon.
Lower the oven temperature to 375°F (190°C). Remove the chicken briefly and, using a silicone brush, generously coat the entire bird with the Thai peanut glaze.
Phase 5: The Final Stretch
Return the chicken to the oven. Continue roasting, basting with more peanut glaze every 15 minutes. If the peanut butter begins to brown too quickly or look like it might burn, tent the bird loosely with aluminum foil.
The chicken is done when an instant-read thermometer inserted into the thickest part of the thigh (without hitting bone) registers 165°F (74°C). This usually takes about 1 hour to 1 hour and 15 minutes total, depending on the weight.
Phase 6: The Rest
This is the most skipped, yet most important, step. Transfer the chicken to a cutting board and let it rest for at least 20 minutes. Resting allows the juices to redistribute. If you cut it immediately, all that liquid gold will run out, leaving you with dry meat.
The Art of the Side Dish: Completing the Family Table
A Garlic Butter Thai Peanut Whole Chicken is a bold center-piece that requires sides that can either complement its richness or provide a refreshing contrast.
1. Coconut Jasmine Rice
The natural partner for peanut sauce. Cook jasmine rice with a 1:1 ratio of water and coconut milk, adding a pinch of salt and a bruised stalk of lemongrass. The subtle sweetness of the rice absorbs the pan drippings from the chicken perfectly.
2. Smashed Cucumber Salad
To cut through the heavy fats of the butter and peanut, you need acid and crunch. Toss thick slices of English cucumber with rice vinegar, sesame oil, a dash of sugar, and plenty of fresh cilantro and mint. The coolness of the cucumber resets the palate between bites of savory chicken.
3. Charred Broccolini with Chili and Lime
Roast or sauté broccolini until the edges are crispy and charred. Finish with a squeeze of fresh lime juice and a sprinkle of red pepper flakes. The bitterness of the charred greens balances the sweetness of the peanut glaze.
The Science of Roasting: Why High Heat and Fat Matter
To achieve the “Google-ranked” quality of a professional chef, one must understand the Maillard reaction. This is the chemical reaction between amino acids and reducing sugars that gives browned food its distinctive flavor.
By using butter (fat) and peanut butter (fat + sugar), we are accelerating the Maillard reaction. The high initial heat of 425°F starts the rendering of the subcutaneous fat. As the fat melts, it fries the skin from the inside. When the peanut glaze—rich in natural sugars from the peanuts and the added brown sugar—is applied, it undergoes caramelization, creating that deep, complex crust that is the hallmark of this dish.
Furthermore, the garlic in the butter isn’t just for flavor. Garlic contains sulfur compounds that, when cooked slowly in fat, develop a savory “umami” profile that mimics the depth of aged meats.
Health Benefits: A Nutritious Powerhouse
While this dish feels indulgent, it is packed with functional ingredients that offer significant health benefits:
- Garlic: Known for its immune-boosting properties and ability to support heart health by reducing blood pressure.
- Ginger: A natural anti-inflammatory and digestive aid, perfect for a large family meal.
- Peanuts: A fantastic source of plant-based protein, healthy monounsaturated fats, and Vitamin E.
- Turmeric (often found in Red Curry Paste): Contains curcumin, a potent antioxidant.
- Chicken: A lean source of high-quality protein containing all essential amino acids.
By making your peanut sauce from scratch, you avoid the hydrogenated oils and excessive corn syrup found in many store-bought varieties, making this a wholesome choice for the family.
Troubleshooting Common Roasting Issues
Even the best cooks encounter hurdles. Here is how to navigate them:
- Soggy Skin: This usually happens if the oven temperature is too low or if the bird wasn’t dried properly before cooking. If the skin isn’t crisping, turn on the broiler for the last 2 minutes, but watch it like a hawk—the peanut glaze can burn in seconds.
- Dry Breast Meat: The breasts cook faster than the thighs. To prevent drying, you can roast the chicken “upside down” (breast side down) for the first 30 minutes, then flip it over to brown the skin. Alternatively, the garlic butter under the skin acts as a protective shield.
- Burnt Peanut Glaze: Because of the sugar content, the glaze can darken quickly. If it looks too dark before the chicken is cooked, reduce the oven heat and use a foil tent.
Cultivating the Family Connection
The beauty of a whole roast chicken lies in the carving. It is a performance that signifies the start of the meal. In many cultures, the act of breaking bread (or in this case, carving a bird) is a symbol of peace and unity.
When you bring this Garlic Butter Thai Peanut Whole Chicken to the table, the aroma alone will draw everyone in. The scent of roasted garlic mixed with the tropical fragrance of coconut and the earthy toasted notes of peanut is intoxicating.
Encourage your family to eat “family style.” Place the whole chicken on a large platter surrounded by the charred broccolini and a bowl of the coconut rice. Let everyone serve themselves, drizzling extra peanut sauce over their portions. This interactive style of dining encourages conversation and a slower, more mindful enjoyment of the food.
Beyond the First Meal: The Magic of Leftovers
A 5-pound chicken often leaves leftovers, which is a blessing in disguise. The flavors of the Garlic Butter Thai Peanut Chicken actually deepen overnight.
Thai Peanut Chicken Tacos
Shred the leftover meat and warm it gently. Serve in corn or flour tortillas with a quick slaw of cabbage, carrots, and lime juice. Top with crushed peanuts and a drizzle of Sriracha.
Cold Peanut Noodle Salad
Boil some soba or lo mein noodles. Toss them with the shredded cold chicken, any remaining peanut glaze (thinned with a little warm water), sliced scallions, and bell peppers. It’s the perfect lunch for the following day.
Thai-Inspired Chicken Congee
Use the carcass of the chicken to make a rich, aromatic broth. Simmer the bones with ginger, garlic, and star anise. Strain the broth and cook rice in it until it breaks down into a silky porridge (congee). Add the leftover chicken pieces and top with fried shallots and cilantro.
The Cultural Fusion: Why This Dish Represents Modern America
American cuisine has always been a melting pot, but in the 21st century, we are seeing a “Global Fusion” movement that is more sophisticated than ever. We are no longer just “mixing” ingredients; we are respecting the techniques of one culture while applying them to the ingredients of another.
The Garlic Butter Thai Peanut Whole Chicken is a perfect example. It respects the French technique of the poulet rôti—the focus on skin texture and internal moisture—while embracing the flavor profile of a Thai Satay or Gai Yang. It reflects the diversity of the modern American pantry, where fish sauce is as common as ketchup, and ginger is as staple as onions.
Frequently Asked Questions (FAQ)
Can I use chicken pieces instead of a whole chicken?
Absolutely. If you prefer thighs or breasts, you can use the same garlic butter and peanut glaze. However, keep in mind that pieces cook much faster (usually 25–35 minutes). We recommend bone-in, skin-on pieces to get the most out of the glaze and prevent the meat from drying out.
Is this dish very spicy?
The spice level depends entirely on the Red Curry Paste and whether you add Sriracha. As written, the recipe provides a “mild-to-medium” warmth that is generally kid-friendly. For a completely mild version, reduce the curry paste to 1 tablespoon.
Can I make this dairy-free?
Yes. Simply swap the butter for a high-quality vegan butter substitute or use coconut oil. The coconut oil will actually complement the Thai flavors beautifully, though you will lose that specific “French bistro” buttery finish.
What if I have a peanut allergy?
You can substitute the peanut butter with almond butter or sunflower seed butter (SunButter). Sunflower seed butter provides a very similar earthy flavor and creamy texture, making it an excellent nut-free alternative.
How do I get the skin extra crispy?
The secret is the “dry chill.” Leave the salted chicken in the fridge uncovered for a full 24 hours. This dehydrates the skin, making it paper-thin and ready to shatter like glass once it hits the hot oven and the butter.
Conclusion: A New Tradition
The Garlic Butter Thai Peanut Whole Chicken is more than just a recipe; it’s an invitation to explore flavor. It’s a dish that feels like a celebration, turning a standard Tuesday night into a special occasion. By combining the rich, comforting world of garlic butter with the vibrant, electric world of Thai peanut sauce, you create a meal that is unforgettable.
So, the next time you find yourself at the grocery store standing before the poultry section, grab a whole bird. Take it home, treat it with the respect of a dry brine, stuff it with garlic butter, and paint it with peanut glaze. Your family—and your taste buds—will thank you.
This is the future of the family dinner: bold, inclusive, and incredibly delicious. Enjoy the process, savor the aromas, and most importantly, enjoy the company of those around your table. Happy roasting!