
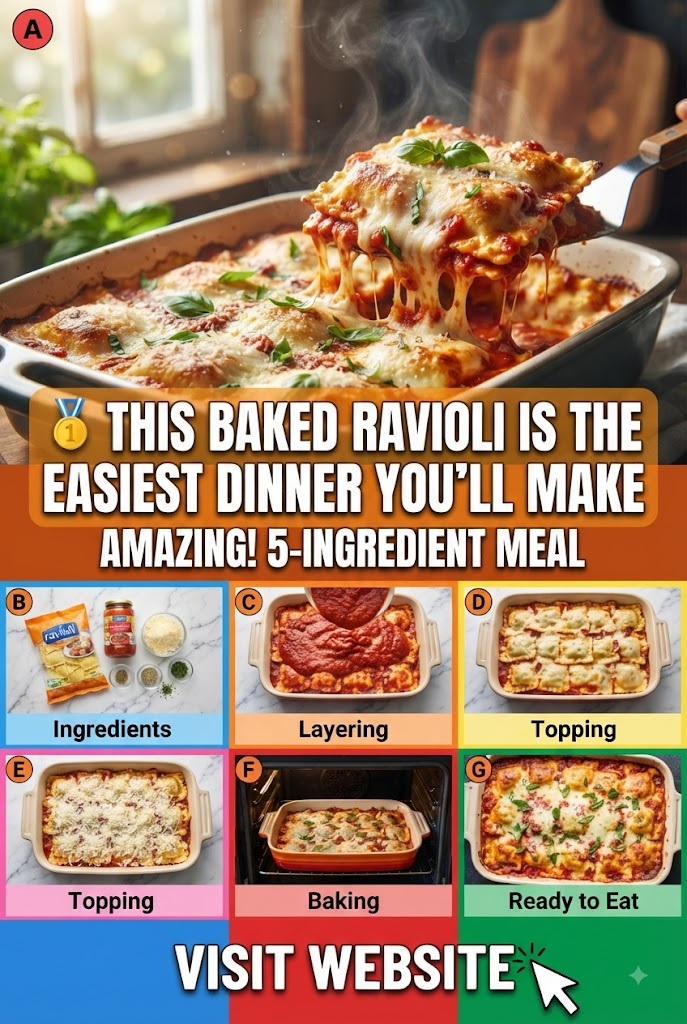
We have all been there. It’s 5:30 PM on a Tuesday, the kids are asking what’s for dinner for the seventeenth time, and the motivation to stand over a stove boiling a massive pot of water is exactly zero. You want something that tastes like a labor of love—something with bubbling cheese, rich tomato sauce, and that comforting Italian-American soul—but you only have about ten minutes of actual energy to put into the preparation.
Enter the miracle that is Baked Ravioli. In my house, we affectionately call this “Lazy Lasagna,” but honestly, that name doesn’t do it justice. While it shares the same flavor profile as a traditional layered lasagna, it bypasses all the tedious steps that make lasagna a “Sunday only” project. There is no boiling of temperamental noodles that stick together. There is no messy mixing of ricotta and egg in a separate bowl. There is just the simple, rhythmic assembly of layers that results in a golden-brown, cheesy masterpiece.
This recipe has become my go-to for everything from neighborhood potlucks to those nights when the pantry looks bare but the freezer is holding a bag of cheese ravioli like a winning lottery ticket. It’s the ultimate crowd-pleaser because, let’s be real, who doesn’t love pasta stuffed with cheese and smothered in more cheese?
In this guide, I’m going to walk you through how to perfect this dish, including the one “no-boil” secret that will change your weeknight cooking forever. We’ll talk about how to choose the right sauce, why the type of cheese matters more than you think, and how you can dress this up or down depending on what’s in your crisper drawer.
Why This Recipe is a Weeknight Game-Changer
What makes Baked Ravioli so special isn’t just the taste; it’s the efficiency. In the culinary world, we often equate time with quality, but this dish proves that theory wrong. Here are the three reasons this recipe has earned a permanent spot in my meal rotation:
- Zero Prep Work: Unlike a pasta bake where you have to pre-boil the noodles to al dente, this recipe uses frozen ravioli straight from the bag. The moisture from the sauce and the steam trapped under the foil do all the cooking for you inside the oven.
- Minimal Cleanup: You need a 9×13 baking dish and maybe a spoon. That’s it. No colanders, no giant pasta pots, and no messy stovetop splashes.
- Infinite Versatility: Once you master the base “formula,” you can swap the ravioli fillings (think spinach and ricotta, mushroom, or even lobster) and change the sauce to create a completely different meal every time.
The Simple Shopping List
One of the best parts about this recipe is that you probably already have at least half of these items in your kitchen. If not, a quick run to any standard grocery store will get you everything you need without breaking the bank.
- Frozen Cheese Ravioli: You’ll need a standard 25-ounce bag. I prefer the jumbo round ravioli because they feel more substantial, but the square ones work perfectly fine. You don’t even need to thaw them!
- Marinara Sauce: Two 24-ounce jars. This might seem like a lot of sauce, but the frozen pasta absorbs a significant amount of liquid as it cooks. If you skimp on the sauce, you’ll end up with dry, crunchy edges.
- Mozzarella Cheese: 3 cups, shredded. Please, if you have the extra three minutes, grate your own from a block. Pre-shredded cheese is coated in potato starch or cellulose to prevent clumping, which means it doesn’t melt nearly as smoothly as a fresh block.
- Parmesan Cheese: ½ cup, freshly grated. This adds a salty, nutty bite that cuts through the richness of the mozzarella.
- Fresh Herbs: A handful of fresh basil or parsley for garnish. It adds a pop of color and a fresh aroma that makes the dish feel “fancy.”
- Optional Meat: If you want a heartier meal, a pound of browned Italian sausage or ground beef mixed into the sauce takes this to the next level.
Pro-Level Ingredient Hacks
While the recipe is simple, the quality of your ingredients will dictate the final result. Since we aren’t spending hours simmering a sauce from scratch, we have to be smart about what we buy.
Selecting the Sauce
Don’t just grab the cheapest jar on the shelf. Look for a marinara where “tomatoes” are the first ingredient and there is little to no added sugar. A high-quality sauce usually has visible bits of onion, garlic, and herbs. If you find your sauce is a bit too acidic, a tiny pinch of sugar (about half a teaspoon) can balance it out.
The Ravioli Debate: Frozen vs. Fresh
You might be tempted to use the “fresh” refrigerated ravioli found in the deli section. While those are delicious, they cook much faster than frozen ones. If you use refrigerated ravioli, you’ll need to reduce the baking time by about 10-15 minutes, or they might turn to mush. For this specific bake-from-dry method, frozen ravioli is actually the superior choice because it holds its structure better during the long steaming process.
Cheese Considerations
If you want to get really wild, try a blend. Mix the mozzarella with some provolone for a sharper flavor, or add dollops of ricotta between the layers for an even creamier texture. Just ensure the top layer is always a good melting cheese so you get those beautiful golden bubbles.
Kitchen Gear You’ll Need
You don’t need a professional kitchen to pull this off. A few basic tools are all it takes:
- 9×13-inch Baking Dish: Glass, ceramic, or metal all work. Glass is great because you can see the sauce bubbling at the bottom.
- Aluminum Foil: This is crucial. Without a tight foil seal, the steam escapes, and your ravioli won’t cook through.
- Cheese Grater: For that fresh-blocked mozzarella and parmesan.
- Large Spoon or Offset Spatula: To spread the sauce evenly.
The “No-Boil” Secret: How to Assemble
This is the core of the recipe. The assembly is where the magic happens. Follow these steps for a perfect bake every single time.
Step 1: Prep the Oven and Pan
Preheat your oven to 400°F (200°C). Spray your baking dish with a bit of non-stick cooking spray or rub it with a tiny bit of olive oil. This ensures that the bottom layer of sauce doesn’t bake onto the glass, making cleanup a breeze.
Step 2: The Foundation
Spread about 1 cup of marinara sauce across the bottom of the dish. This layer is vital—it prevents the ravioli from sticking to the bottom and ensures the bottom of the pasta gets cooked.
Step 3: Layering the Pasta
Arrange half of the frozen ravioli in a single layer over the sauce. It’s okay if they overlap slightly, but try to keep it as even as possible.
Step 4: Sauce and Cheese
Top the ravioli with another 1 to 1.5 cups of sauce. Ensure every piece of pasta is covered in sauce; any exposed pasta edges might remain hard. Sprinkle with half of the mozzarella cheese and half of the parmesan.
Step 5: Repeat
Add the remaining frozen ravioli in another layer. Top with the rest of the sauce, ensuring the pasta is fully submerged. Hold off on the final layer of cheese for now!
Step 6: The First Bake
Cover the dish tightly with aluminum foil. Bake for 30 minutes. This is the “steaming phase” where the frozen pasta absorbs the liquid from the sauce.
Step 7: The Cheese Reveal
Remove the dish from the oven and carefully peel back the foil (watch out for the steam!). Sprinkle the remaining mozzarella and parmesan cheese over the top.
Step 8: The Final Crisp
Return the dish to the oven, uncovered, for another 15-20 minutes. You’re looking for the cheese to be completely melted, bubbly, and starting to brown in spots. If you like a really crispy top, you can pop the broiler on for the last 2 minutes, but watch it like a hawk so it doesn’t burn!
Step 9: The Rest Period
This is the hardest part. Let the Baked Ravioli sit on the counter for about 5-10 minutes before serving. This allows the sauce to thicken slightly and the layers to set, making it much easier to scoop out clean portions.
Watch Out for These Common Missteps
Even a recipe this simple can have a few pitfalls. Avoid these mistakes to ensure dinner is a success:
- Using Too Little Sauce: I cannot stress this enough. Frozen ravioli are thirsty. If you don’t use enough sauce, the pasta will be chewy and undercooked. It should look like there’s a bit too much sauce when you put it in—by the time it comes out, it will be perfect.
- Not Sealing the Foil: If the foil is loose, the moisture escapes. Make sure you crimp the edges of the foil around the rim of the baking dish.
- Overcooking: If you leave it in too long, the ravioli can lose its structural integrity and burst, leading to a “ravioli soup” situation. It still tastes good, but it’s not as pretty.
- Skipping the Rest: If you cut into it immediately, the sauce will run everywhere. Patience is a virtue (and leads to better-looking plates).
Creative Twists on the Classic
Once you’ve mastered the basic cheese and marinara version, you can start getting creative. Here are some of my favorite variations:
The Meat-Lover’s Bake
Brown a pound of sweet Italian sausage or lean ground beef with some onions and garlic. Mix the cooked meat into your marinara sauce before layering. This adds a savory depth that makes the dish feel incredibly substantial.
The “Veggie Supreme”
Sauté some sliced mushrooms, bell peppers, and baby spinach. Layer these veggies between the ravioli. It’s a great way to sneak some nutrients into a kid-friendly meal.
Pesto Chicken Ravioli
Swap the marinara for a mix of Alfredo sauce and pesto. Use chicken-filled ravioli and top with mozzarella and toasted pine nuts. It’s a bright, herbaceous take on the classic bake.
The Spicy Kick
Use “Arrabbiata” sauce instead of standard marinara and add a teaspoon of red pepper flakes to the cheese layers. This is perfect for those who like a little heat with their pasta.
Seafood Delight
Use lobster or shrimp ravioli and a vodka sauce instead of marinara. This version feels much more “date night” and pairs beautifully with a glass of crisp white wine.
What to Serve with Your Cheesy Bake
While Baked Ravioli is a meal in itself, adding a few side dishes can turn it into a full Italian feast.
- The Classic Garlic Bread: Is any pasta meal complete without it? I like to make mine with plenty of butter, fresh garlic, and a sprinkle of dried oregano. Use the bread to mop up any leftover sauce on your plate.
- Arugula Salad with Lemon Vinaigrette: Since the main dish is very rich and cheesy, a bright, peppery salad provides a necessary contrast. A simple dressing of olive oil, lemon juice, salt, and pepper is all you need.
- Roasted Broccolini: Toss some broccolini with olive oil and red pepper flakes and roast it on a sheet pan while the ravioli is in the oven. The charred edges of the veg go great with the tomato sauce.
- Wine Pairing: If you’re serving this to adults, a medium-bodied red wine like a Chianti or a Sangiovese is a perfect match. The acidity in these wines cuts right through the richness of the cheese.
Managing Leftovers and Meal Prep
One of the reasons I love this recipe is that it actually tastes better the next day. As it sits in the fridge, the flavors have more time to meld together.
Storage Tips
Place any leftovers in an airtight container. They will stay fresh in the refrigerator for up to 4 days.
Freezing Instructions
You can actually assemble this entire dish (up to the point of baking) and freeze it for later.
- Assemble the layers in a freezer-safe foil pan.
- Cover tightly with plastic wrap, then a layer of heavy-duty aluminum foil.
- Label with the date. It will stay good for up to 3 months.
- When you’re ready to eat, bake it straight from the freezer at 375°F. You will likely need to add about 20-30 minutes to the covered baking time.
Reheating Tips
To prevent the ravioli from drying out when reheating, I recommend the microwave or the oven.
- Microwave: Place a portion on a plate, add a tiny splash of water or extra sauce, and cover with a damp paper towel. Heat in 1-minute intervals.
- Oven: Place leftovers in a small baking dish, cover with foil, and bake at 350°F until heated through. This helps maintain the texture of the cheese better than the microwave.
The Cultural Significance of the Pasta Bake
In America, the “casserole” or “bake” has a long history of being the backbone of family dining. It represents a fusion of traditional Italian techniques (layering pasta and sauce) with the American need for efficiency and convenience. Baked Ravioli specifically rose to popularity in the mid-20th century as frozen food technology improved. It allowed families to enjoy the flavors of a multi-hour lasagna in a fraction of the time.
There’s something inherently communal about a big dish being placed in the center of the table. It invites people to dig in, to ask for seconds, and to linger over conversation. Even though this recipe is “easy,” the result is a dish that feels warm and inviting—the very definition of comfort food.
Nutritional Information (Per Serving)
While this is definitely a “comfort food” meal, it’s helpful to know what’s under the hood. (Estimates based on standard ingredients):
- Calories: 450-550 kcal
- Protein: 22g
- Carbohydrates: 48g
- Fat: 24g
- Fiber: 4g
- Sodium: 950mg (Note: This can be reduced by choosing “low sodium” marinara and cheese).
If you want to lighten it up, try using a cauliflower-based ravioli (now common in many health food stores) and a part-skim mozzarella.
Frequently Asked Questions
Can I use meat ravioli instead of cheese? Absolutely! Beef, sausage, or even veal-filled ravioli work beautifully with this method. The cooking time remains the same.
What if my sauce is very thick? If you are using a particularly thick, chunky sauce, I recommend adding about ¼ cup of water or beef broth to the jars and shaking them before pouring. This extra liquid ensures the pasta has enough moisture to cook through.
Do I have to use two jars of sauce? If you like a very “dry” pasta bake, you could get away with one and a half jars, but for the best texture, two jars is the sweet spot. Remember, the pasta absorbs a lot of it!
Can I make this in a slow cooker? Yes! You can layer the ingredients in a greased slow cooker. Cook on Low for 3-4 hours. Just be aware that you won’t get that crispy, browned cheese top that the oven provides.
Help! My ravioli is still hard after 30 minutes! Don’t panic. Oven temperatures vary. Simply put the foil back on and bake for another 10 minutes. Check a piece of pasta with a fork; it should be tender all the way through.
Is it okay to use fresh ravioli? Yes, but you need to be careful. Fresh (refrigerated) ravioli has much more moisture than frozen. Reduce the initial covered baking time to 15-20 minutes, then check for doneness.
What’s the best way to prevent the cheese from sticking to the foil? If your baking dish is very full and the cheese is touching the foil, spray the underside of the foil with non-stick cooking spray before covering the dish. This prevents the “cheese cap” from being ripped off when you uncover it.
Can I add extra layers? If you have a deep-dish lasagna pan, feel free to do three layers instead of two. Just make sure you have enough sauce to cover all the extra pasta surfaces!
Can I make this gluten-free? Yes! Many brands now offer excellent gluten-free frozen ravioli. Just ensure your marinara sauce is also certified gluten-free (most are, but it’s always good to check).
How do I make the top extra crispy? After the final bake, if you want more crunch, sprinkle some panko breadcrumbs mixed with a little melted butter over the cheese for the last 5 minutes of baking. It adds a wonderful texture.
The Joy of “Good Enough” Cooking
In a world of Instagram-perfect meals and complex 20-step recipes, there is a profound joy in a meal that is simply “good enough” to be great. This Baked Ravioli isn’t trying to win a Michelin star. It’s trying to win at a busy Tuesday night. It’s trying to make sure everyone at the table is full, happy, and that the cook isn’t exhausted by the time the dishes are done.
There is a specific kind of magic that happens when cheese, tomato, and pasta meet a hot oven. The edges get a little chewy, the cheese gets those toasted brown spots, and the whole house starts to smell like an Italian grandmother’s kitchen. Whether you’re a seasoned home cook or someone who usually relies on takeout, this recipe is a reminder that delicious food doesn’t have to be difficult.
Final Thoughts
The beauty of the Baked Ravioli lies in its simplicity. It’s a template—a canvas for whatever you have in your fridge and however much time you have on your hands. It’s the ultimate “pantry pull” that looks and tastes like a gourmet meal.
Next time you’re wandering the aisles of the grocery store with no plan for dinner, head to the freezer section. Grab that bag of ravioli, two jars of your favorite sauce, and a big block of mozzarella. By the time you’ve changed out of your work clothes and checked the mail, dinner will be halfway done.
Cooking should be a source of pleasure, not stress. Recipes like this help keep it that way. So, pour yourself a glass of something nice, turn on some music, and let the oven do the heavy lifting tonight. You’ve earned it.
Recipe Summary Card
- Prep time: 10 minutes
- Cook time: 50 minutes
- Total time: 1 hour
- Yields: 6-8 servings
Ingredients
- 25 oz Frozen Cheese Ravioli
- 48 oz Marinara Sauce (2 jars)
- 3 cups Shredded Mozzarella Cheese
- 1/2 cup Grated Parmesan Cheese
- Fresh basil for garnish
Instructions
- Preheat oven to 400°F.
- Spread 1 cup of sauce in a 9×13 dish.
- Layer half the ravioli, then 1.5 cups of sauce, then half the cheese.
- Repeat with remaining ravioli and sauce. Save the rest of the cheese for later.
- Cover tightly with foil and bake for 30 minutes.
- Uncover, add remaining cheese, and bake for 15-20 more minutes until bubbly.
- Rest for 10 minutes before serving. Garnish with basil.
Enjoy your “Lazy Lasagna” and the extra free time it gives you!